CHIM Installation

The installation process will assume you are using OpenRouter (Large Language Model) ($5).

Then generate an API key.

It is by far the easiest way to setup the mod for the first time.

You can use alternate AI services later once you get it working.

Installing DwemerDistro

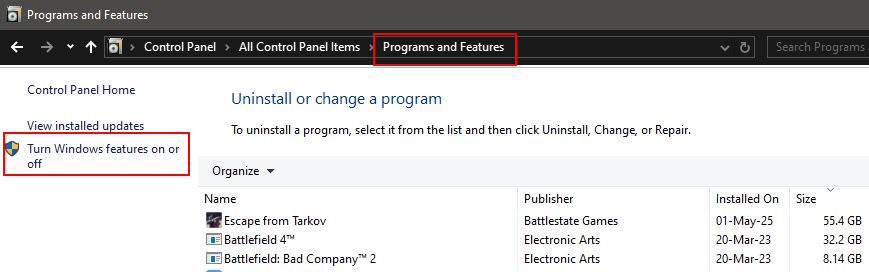
Control Panel - Programs and Features - Turn Windows features on or off
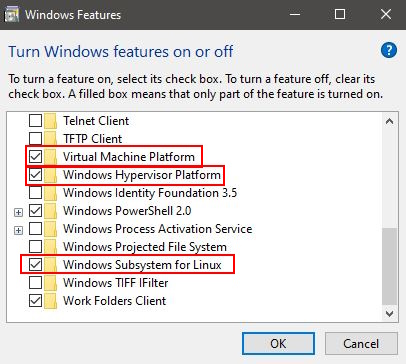
  • Ensure you have Virtual Machine Platform, Windows Hypervisor Platform, and Windows Subsystem for Linux enabled.
Ensure these features are enabled
Ensure these features are enabled.
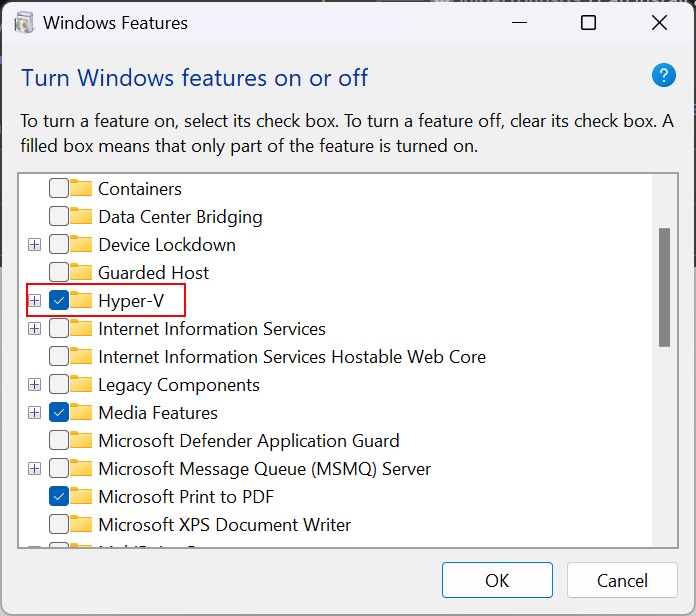
Windows 11 Hyper-V note
For Windows 11 Windows Hypervisor Platform may just be called Hyper-V.
  • Restart your PC.
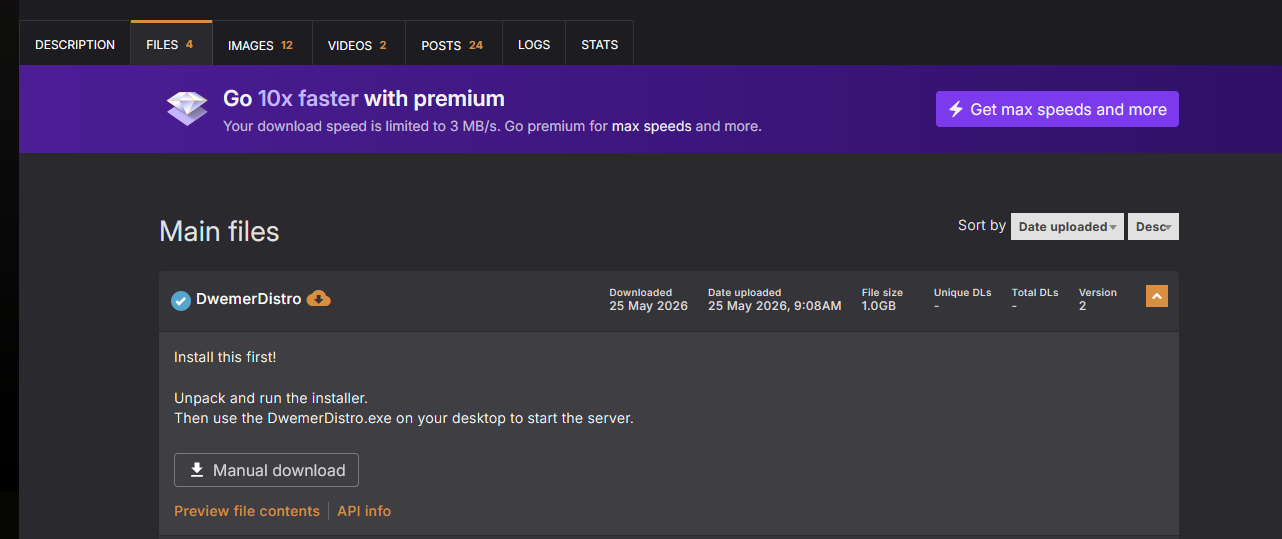
  • Download the DwemerDistro from the mod page.
DwemerDistro download page
  • Extract the .exe anywhere on your PC.
  • Run the DwemerDistroInstaller.exe.
  • Simply follow the installation guide and wait for it to finish.
  • Leave Create desktop shortcut enabled, then click finish once it is complete.
  • Run the DwemerDistro.exe shortcut on your desktop.

Why does Windows Defender say it's a virus? Are you trying to hack me!

No we are not!

Most anti virus programs automatically untrust and false flag less popular .exes.

We have all the source code to the launcher on our GitHub. You can inspect the launcher source on GitHub.

Set Up CHIM in DwemerDistro

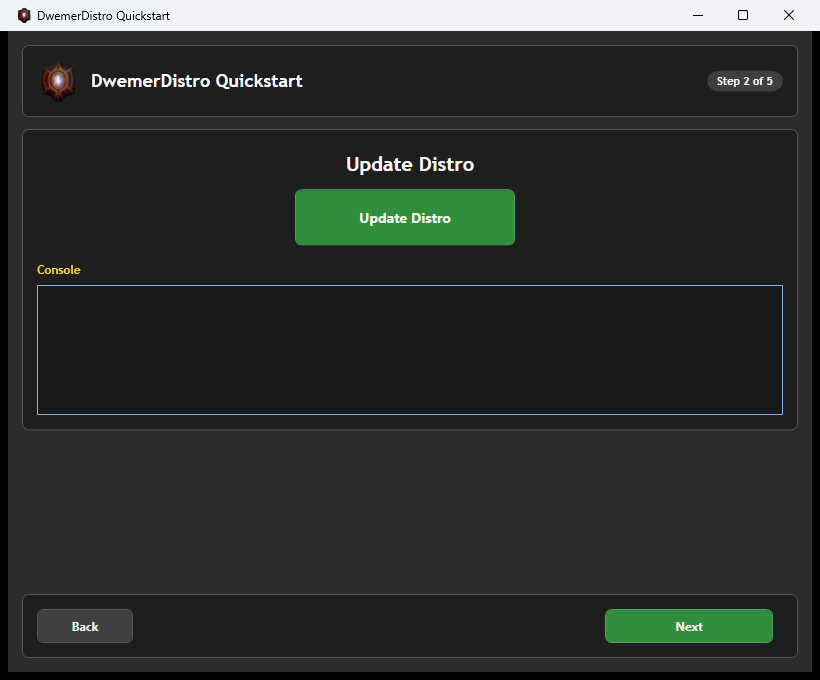
  • On Quickstart Step 2, click Update Distro.
  • Wait for the update to finish, then click Next.
DwemerDistro Quickstart Update Distro step
Update the distro before choosing which mods to install.
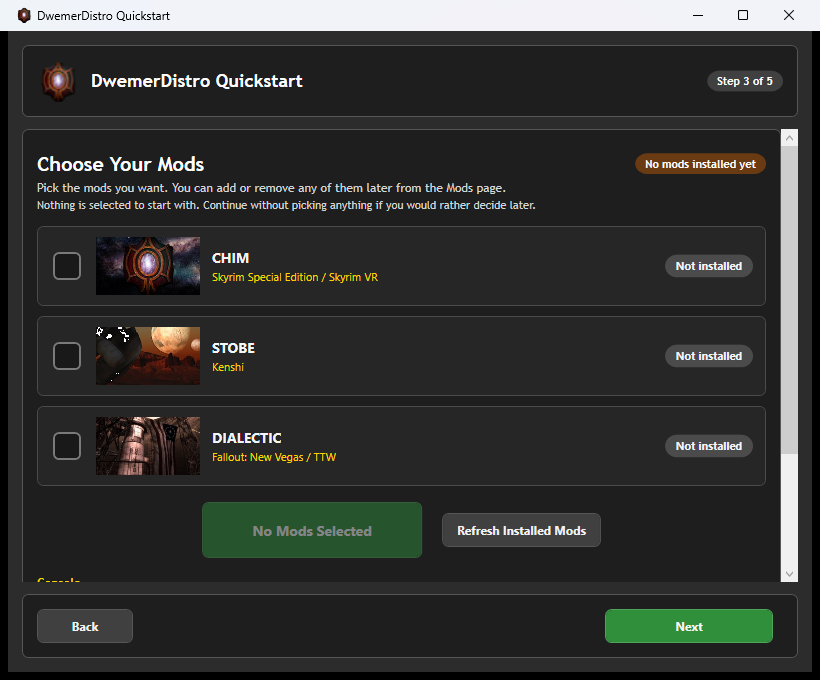
  • Step 3 opens with no mods selected.
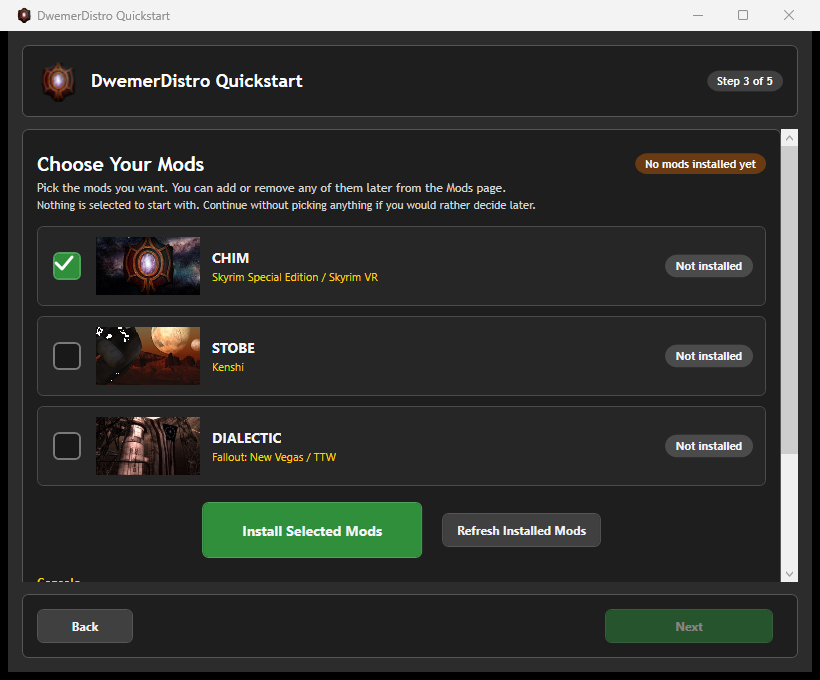
  • Select CHIM, then click Install Selected Mods.
  • Wait for CHIM to finish installing before continuing.
DwemerDistro Quickstart Choose Your Mods screen with no mods selected
Choose Your Mods starts with nothing selected.
DwemerDistro Quickstart with CHIM selected for installation
Select CHIM, then install the selected mod.
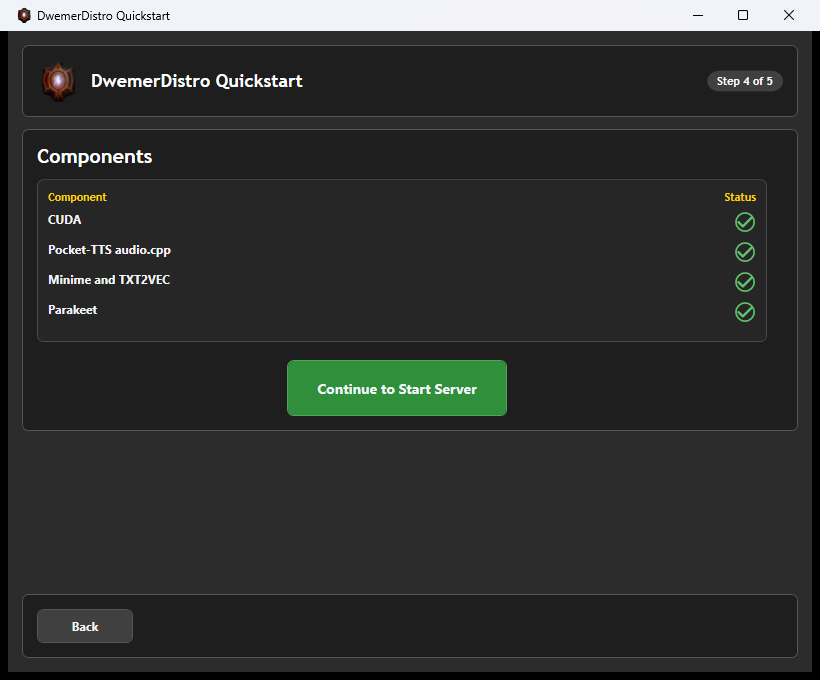
  • Step 4 lists the components detected by DwemerDistro.
  • Review the green status checks, then click Continue to Start Server.
DwemerDistro Quickstart Components step with installed component status checks
Confirm the components are ready before starting the server.

Component Installation Guide:

  • If you have a powerful NVIDIA GPU install CUDA, Minime&TXT2VEC (GPU) & Chatterbox.
  • If you have a less powerful NVIDIA GPU install CUDA, Minime&TXT2VEC (GPU) & Pocket-TTS (GPU).
  • If you have an AMD GPU, download Minime&TXT2VEC (CPU) & Pocket-TTS (CPU).

For Pocket TTS and Chatterbox you must setup a Hugging Face account and accept the terms of service for it here:

Pocket TTS: https://huggingface.co/kyutai/pocket-tts

Chatterbox: https://huggingface.co/ResembleAI/chatterbox

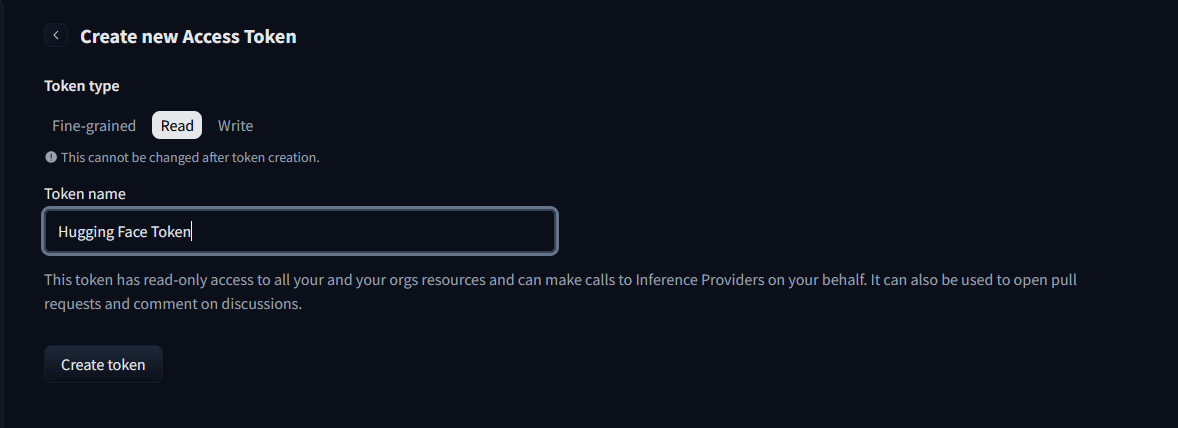
Hugging Face token creation
Access Token Creation. Make sure it has Read access!
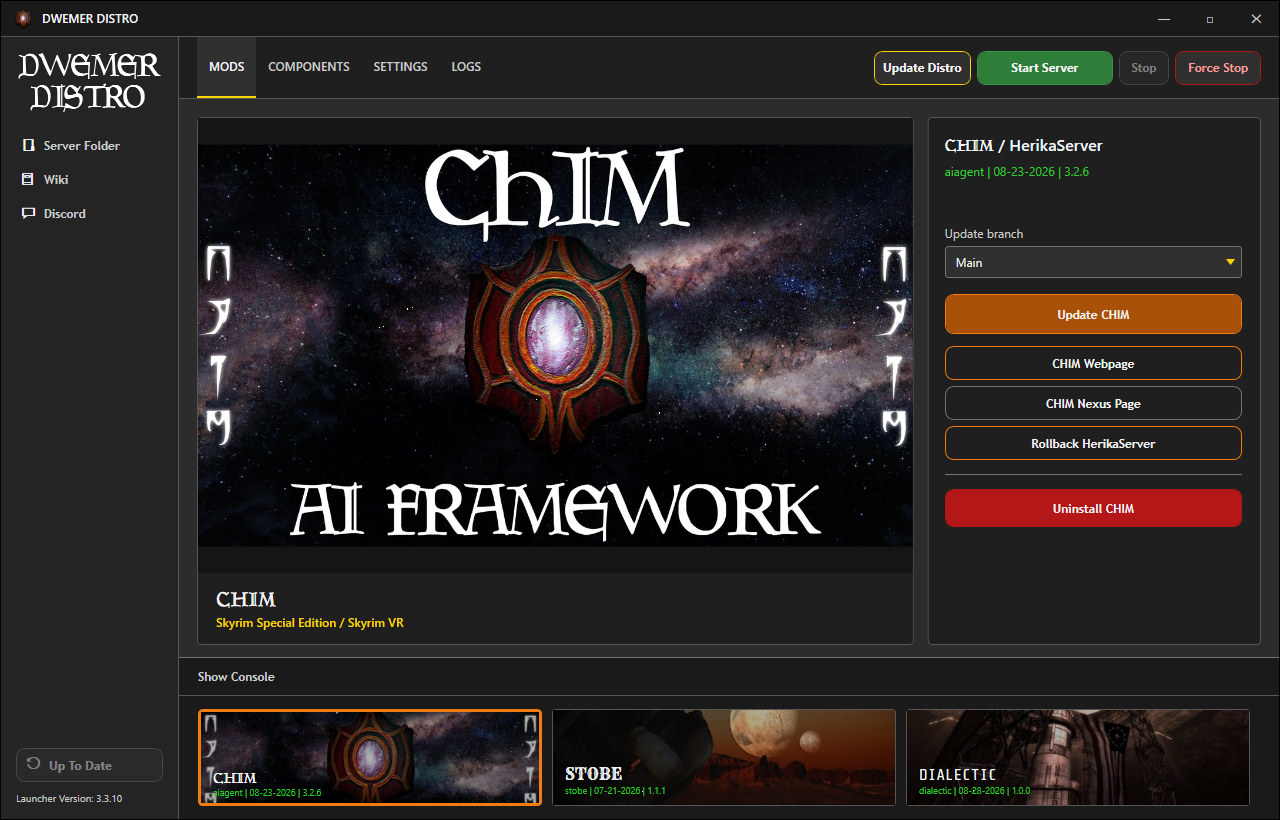
  • After Quickstart finishes, select CHIM on the launcher Mods page.
  • Click CHIM Webpage to open the server website.
  • If the server is stopped, confirm the prompt to start it first.
DwemerDistro CHIM Mods page with Update CHIM and CHIM Webpage controls
The CHIM Mods page provides its update, webpage, Nexus, rollback, and uninstall controls.

CHIM Web Quickstart

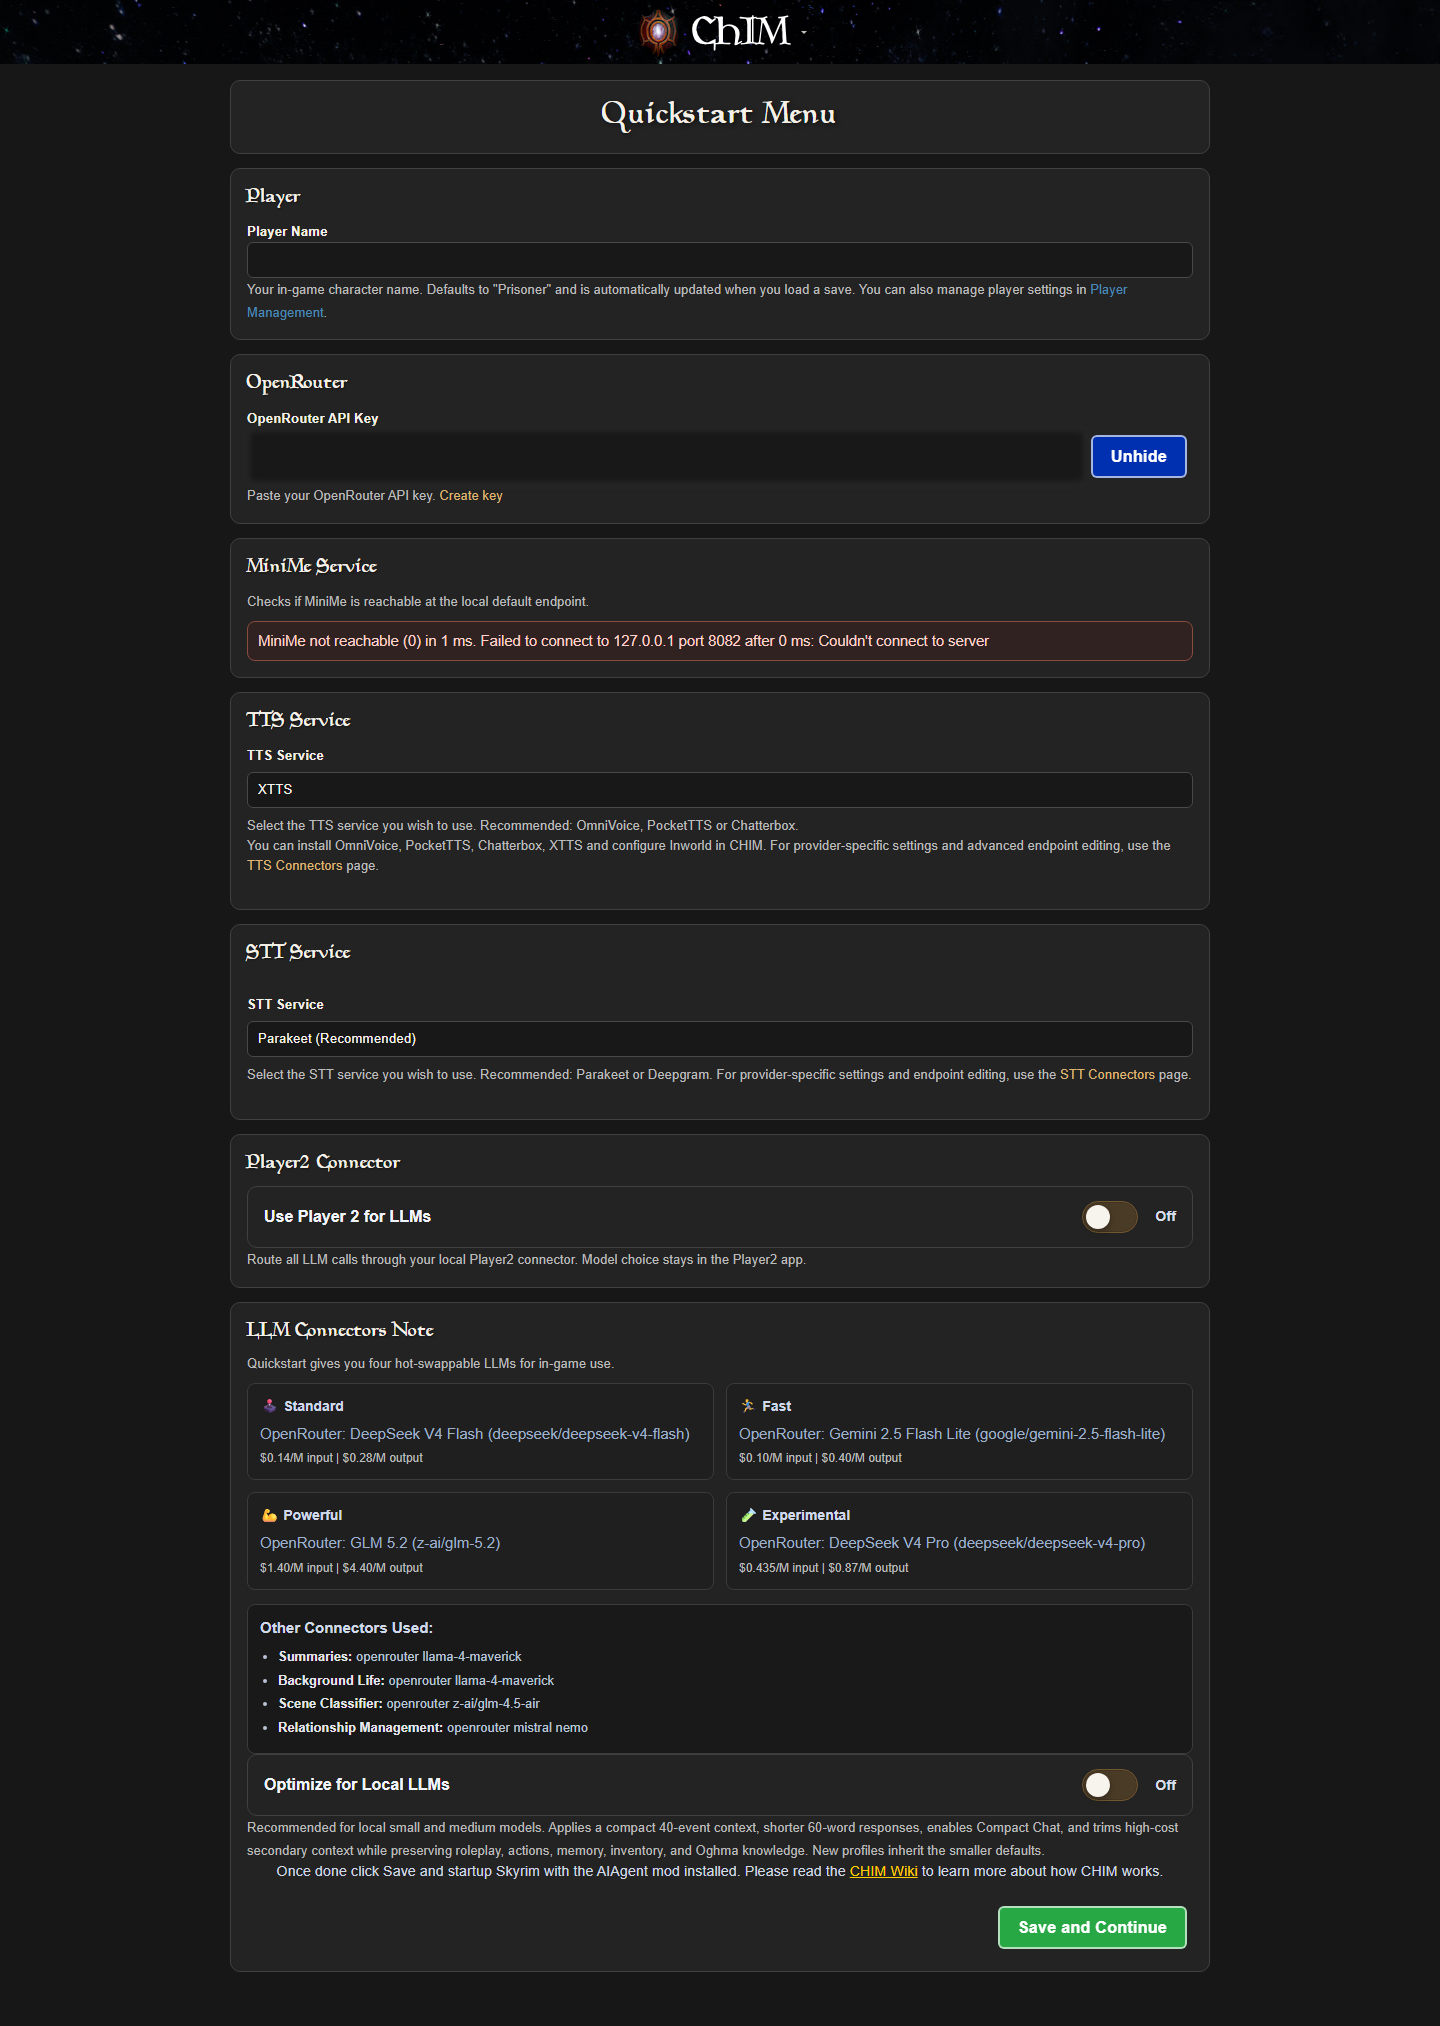
Complete the Quickstart Menu in your browser:

  • Your Player Name is detected from Skyrim. Start or load your game if it still says Waiting for game.
  • Paste your OpenRouter API Key, or use the local Player2 connector.
  • Select your TTS Service and STT Service.
  • Review the four LLM choices and any local-LLM optimization setting.
CHIM web Quickstart Menu with player, OpenRouter, TTS, STT, Player2, and LLM settings
CHIM Quickstart collects the main server settings needed for a first run.
  • Click Save and Continue.

OpenRouter is optional. To use another provider directly, save the rest of QuickStart and follow Use Your Own LLM Provider.

To run your own language model, use the launcher's LLM Studio component. Follow the Local LLM Guide to download, load, test, and connect it inside DwemerDistro.

Quickstart And Updates

Use the Quickstart shortcut on the server home page when you need to return to setup.

  • First check: Send a typed message to a nearby NPC and confirm a reply. Then test voice playback and microphone input.
  • Keep the pair together: Update the game plugin and server to matching versions. Keep your personal settings file when replacing the main mod files.
  • Separate characters: See Playthrough Saves before switching to another character or campaign.